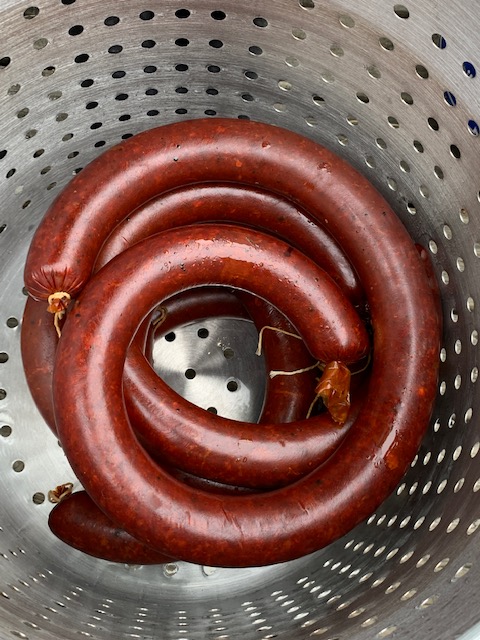
The time and effort put into this cold cured beef garlic sausage yields an incredible, ready to eat product that looks like it came from a butcher shop. First smoked then poached and finally cold cured for a beautiful dried garlic coil.
Cured Beef Garlic Sausage
We went with a beef only grind in this sausage using beef previously ground from our last butcher as well as a fresh ground of cuts from the same animal. The beef had some fat around an 80/20 blend which was perfect for this particular sausage.
The seasoning cure kit was garlic based and quite mild. Follow the directions for the correct amount of cure for the weight of the meat being turned into sausage. We make our batches 25 pounds per batch.
Playing With Flavours
With any new process is always a good idea to follow the kit instructions the first time when trying any new product. It is a great starting off point where you can learn the basics. This also makes it easier to figure out any issues if things go wrong.
Once you know what the finished quality and flavour is, you can confidently start playing with flavours. In the future we plan on amping up the level of garlic substantially.
All meat was ground twice for a tighter finished texture.

Planning Ahead
You will need to plan ahead to make this sausage.
The first day is all about grinding the meat and turning out the sausage. It then goes into refrigeration overnight.

Smoking Low And Slow
The next step in the process requires you to first smoke the coils at a low temperature then poach in a hot water bath. We had to modify how we usually smoke to make this sausage. The main smoker we use gets too hot even on the lowest setting. To remedy this we purchased an inexpensive electric hot plate to go in the bottom of our main unit. It gets hot enough to smoke the sausage at a low enough temperature as to not cook the coils.
Smoke the coils of sausage at 130F – 140F for a few hours. You want the casings to have a nice deep smoked colour. After 2 hours it is time to move the coils into the poaching water.

Poaching The Sausage
You want to have the poaching water fairly warm when you move the coils from the smoker to the poaching liquid. A digital thermometer is a useful tool to assure you keep the water below 170F. Poach the coils until an internal temperature of 158F is reached.

Remove the coils immediately from the hot water.
Cool Water Bath
Once the poaching is done the sausage needs to be cooled quickly to stop the cooking process. This can be done in tubs of cold water or spray them down with a garden hose.

Wood Chips
We always go for apple or cherry wood chips when doing any smoking. They are readily available they are the preferred flavour for any application. They are a great choice for long smokes as they do not add any bitterness like some other flavours of chips.
Hanging The Sausage To Dry
You will need to have a cool location to hang and dry the sausage before it goes into cold storage to cure. We used the garage and hung the sausage off of one of my photography backdrop stands. Any type of pole suspended above the ground will work. Cover the pole with plastic wrap to protect the sausage from contamination.
There may be a bit of fat in the liquid that drains from the coils once hung, place something absorbent like cardboard under the drying rack to collect the drippings.

Once the coils are completely dry place them in refrigeration for the curing process. Flip the coils over every 24 hours so each side of the coil has air exposure. We cured our garlic sausage for 10 days but leaving it up to 14 days is not uncommon.

Testing For Doneness
At day 8 you can slice into a coil to see how the cure is going. If the center of the sausage is wet and lighter in colour than the outer part of the sausage it is not ready. You are looking for consistent colour and dryness across the entire surface of the sausage.

The longer the sausage cures for the drier the final product will be.

Cured Beef Garlic Sausage

- Ground beef or cuts to be ground.
- Sausage seasoning/cure kit
- Casing
- butchers' twine
- wood chips for smoking
- Grind all cuts of beef twice.
- Mix the cure and seasoning into the beef according to the instructions on the packaging.
- Using a sausage stuffer fill the casings.
- Tie the ends of the coils with butchers twine.
- Place the coils in refrigeration overnight.
- The next day place the coils into a preheated smoker.
- Maintain the smoker at 130F - 140F for 1 -2 hours
- Place smoked sausage into a hot water bath to poach.
- Do not allow the poaching water to go over 170F.
- Keep in the poaching water until an internal temperature of 158F is achieved.
- Remove the coils from the poaching water and immediately plunge into cold water to stop the cooking process.
- Prick the casing to allow any excess fat to drain off.
- Once cool hang the sausage in a cold location and allow the sausage to air dry.
- There may be a bit of fat in the liquid that drains from the coils, place something absorbent like cardboard until the drying rack to collect the drippings.
- Once the coils have dried for a few hours move into cold storage to begin curing.
- The temperature must be between 2C and 4C degrees to maintain a food safe environment.
- Flip the coils every 24 hours.
- You can check the state of the cure on day 8.
- If the center of the sausage is wet and lighter in colour than the outer part of the sausage it is not ready.
- You are looking for consistent colour and dryness across the entire surface of the sausage.

Cut and wrap the sausage in butcher paper. It will store well in the freezer for up to 12 months.
Slice and enjoy. It would also make a spectacular addition to your next charcuterie board.


