This Grape Jelly is easy to make and celebrates the best of the season.
I was lucky enough to work alongside and make a new friend this past year who had an incredible harvest of grapes from his zone 3b garden. Successfully growing grapes in a colder growing area is possible when you have a variety that is suited for that particular zone.
Want to learn more about growing zones and where you live? We have all the information here to find your growing zone.

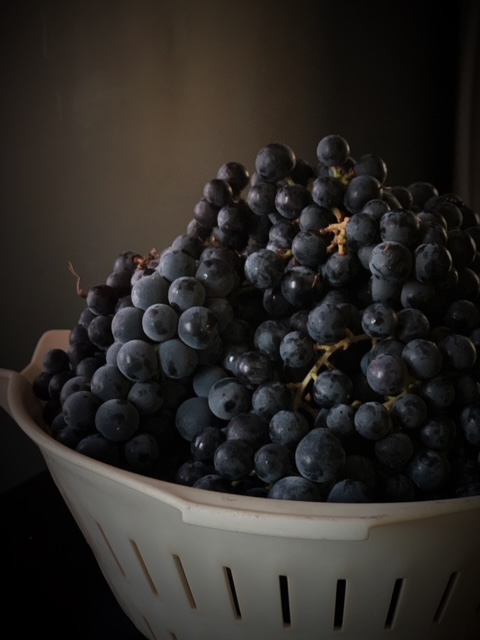
Valiant Grapes
Bill’s garden is quite spectacular and in 2022 he harvested a bumper crop of Valiant Grapes. I found myself with not 1 but 2 5-gallon pails of these incredible blue hued grapes. They look like blueberries with the distinct flavour of coronation grapes.

Juicing the Grapes for Jelly
The first step in any jelly making process is to juice the fruit. Because grapes are very heavy with seeds, making jelly is the best option. If you were to make jam it would have to be strained to remove the many seeds and it quickly becomes labour intensive and messy.
Wash the grapes and remove any stems. We want to crush the grapes to release the juice. This is done in layers. Add a layer to the pot and cush the grapes with a potato masher. Keep adding grapes a layer at a time making sure to crush as many as possible.
After they are crushed, add 1 1/2 cups of water. We want to simmer the grapes to help release those juices. Simmer over medium low heat for 10 minutes making sure to give the pot an occasional stir.

Straining The Juice to make Grape Jelly
Now we need to strain the juice. We do this using layers of cheese cloth and creating a bundle. Place a colander over a large container. Place one sheet of cheese cloth over the colander then lay another sheet of cloth in the other direction making sure you have enough length to create a bundle.

Ladle the crushed grapes and juice into the cheese cloth lined colander and allow the juice to drip. Once the majority of juice has dripped into the container, we want to create a bundle from the cheese cloth.
We hang this bundle for a few hours to let gravity pull out the remainder of the juice. Use a string long enough to tie around the bundle and have some extra to tie around something to be able to hang it. I use the handle on my cupboard to suspend the bundle.

Allow this to drip for 2 hours.
Preparation for Canning
As in all canning projects be sure to use clean sterilized jars and new snap lids. I place my jars in a hot oven (250C) before I start making the jelly.
The rings go into a pot of fresh water and set over a low heat.
One recommendation is to use a nice deep pot. We need to be able to bring the juice and sugar to a full rolling boil which creates a lot of lift in the pot. If the pot you are using is too small it WILL overflow onto the stove at a full rolling boil. Not only is this a huge mess and a waste of precious juice, but it also becomes a very serious burn hazard.
The Canning Area
Placing a large tea towel on the surface of where I will be filling the jars protects the tabletop from the heat of the jars. I also have hot mats ready for the pot of jelly and the tray of jars. A fresh damp cloth will be needed to wipe the rims of the jars.
A canning funnel is a handy tool that should be used for all canning projects. It fits perfectly into the mouth of the jar reducing spills and makes for fast work.
The last tool in your canning tool kit should be canning tongs. They are made to grip the mouth of the jar to easily move the jars in and out of the canner. This is a hot job and the tongs are a must.
You can buy kits of canning tools and they often come in packages with large canners.
Hot Water Bath
When canning, the final product needs to be processed in a hot water bath. The process helps safely preserve the food and is also important for creating a good seal on the jars.
We determine how long the filled jars have to be processed for according to the elevation of where you are.
Altitude Increase Processing Time
FEET METERS
1001 – 3000 306 – 915 5 minutes
3001 – 6000 916 – 1830 10 minutes
6001 – 8000 1831 – 2440 15 minutes
8001 – 10,000 2441 – 3050 20 minutes
Making Grape Jelly
You will notice I use butter in my jelly. This helps prevent foaming on the surface of the jelly after it has been boiled. As jelly cools a skin can form on the surface of the jelly which needs to be removed. Adding butter reduces that skin to near zero. It is a step I never skip when making jelly.
Measure out 5 cups of grape juice into a large pot. Refrigerate any extra juice. Add the pectin powder and stir until dissolved. Cook over a medium high heat until the juice begins to boil. Add the butter and bring the mixture to a full rolling boil. Now add the sugar and stir to dissolve. Bring the pot to a full rolling boil and boil hard for 1 minute. Carefully remove the pot from the heat. Place it on a hot mat in your canning area. Skim the surface with a tablespoon if required.
Ladle the jelly into hot jars, leaving a half inch of headspace. Wipe the rims with a damp cloth. Add the snap lid and screw band just until finger tight. Repeat with the remaining jelly.
Grape Jelly

- 4 lbs of grapes
- 1½ cups of water
- 6 cups of sugar
- 1 package of pectin powder
- 1 tablespoon butter
- Wash the grapes and remove any stems.
- Weigh out 453 grams of grapes for each pound.
- We want to crush the grapes to release the juice.
- Add a layer to the pot and cush the grapes with a potato masher.
- Keep adding grapes a layer at a time making sure to crush as many as possible.
- Crush the grapes, add 1½ cups of water and place over medium low heat.
- Bring the pot to a simmer and stir occasionally.
- Simmer for 10 minutes.
- Remove from heat and allow to cool for 10 minutes.
- Ladle the juice and grape pulp into a cheese cloth lined colander that is suspended over a container to collect the juice.
- Allow to strain for 2 hours.
- After 2 hours create a bundle with the cheese cloth using enough string to suspend it from a cabinet handle.
- Let this drip for another hour or 2 to collect as much juice as possible.
- Measure out 5 cups of grape juice into a large pot. Refrigerate any extra juice. Add the pectin powder and stir until dissolved. Cook over a medium high heat until the juice begins to boil. Add the butter and bring the mixture to a full rolling boil. Now add the sugar and stir to dissolve. Bring the pot to a full rolling boil and boil hard for 1 minute. Carefully remove the pot from the heat. Place it on a hot mat in your canning area. Skim the surface with a tablespoon if required.
- Ladle the jelly into hot jars, leaving a half inch of headspace.
- Wipe the rims with a damp cloth.
- Add the snap lid and screw band just until finger tight.
- Repeat with the remaining jelly.
- Using canning tongs, place the jars of grape jelly into the canner leaving space between the jars.
- Make sure the level of the water is a minimum of an inch over the jars.
- Cover the canner and bring the water to a boil.
- Boil for the length of time determined by the chart above.
- Remove jars from the canner using tongs.
- Allow to sit undisturbed until fully cooled up to 24 hours.
- Wipe down the jars if needed and lable.
- Store in a cool dark location for up to a year.
Hot Water Bath
After the jars are filled and the lids and rings are in place the jars of jelly need to go into a hot water bath. I will have my large canner half filled with hot water simmering on a burner. Using canning tongs I place the jars into the canner making sure to leave space between the jars. The level of the water needs to be at least an inch over the jars. Cover the canner and bring the water to a boil. Process for 5 minutes or more depending on your elevation. Use the chart above to determine how long you will process your jars for.
Remove the jars from the canner using canning tongs. Set them on the counter and allow to cool. Some jellies may take a bit longer to set, leave the jars undisturbed for 24 hours. If needed, wipe down the jars and label. Store them in a dark cool location for up to 1 year.
Store any unsealed jars in the fridge to be used first.

If you have extra grape juice, you will love this recipe for Coronation Grape Meringue Tarts. The juice from these Valiant Grapes would make a beautiful filling for tarts or between layers of a cake.
Be sure to check out our entire Preserving Resource Page for some incredible recipes for pickles, jams and smoked meats like bacon and fish!


