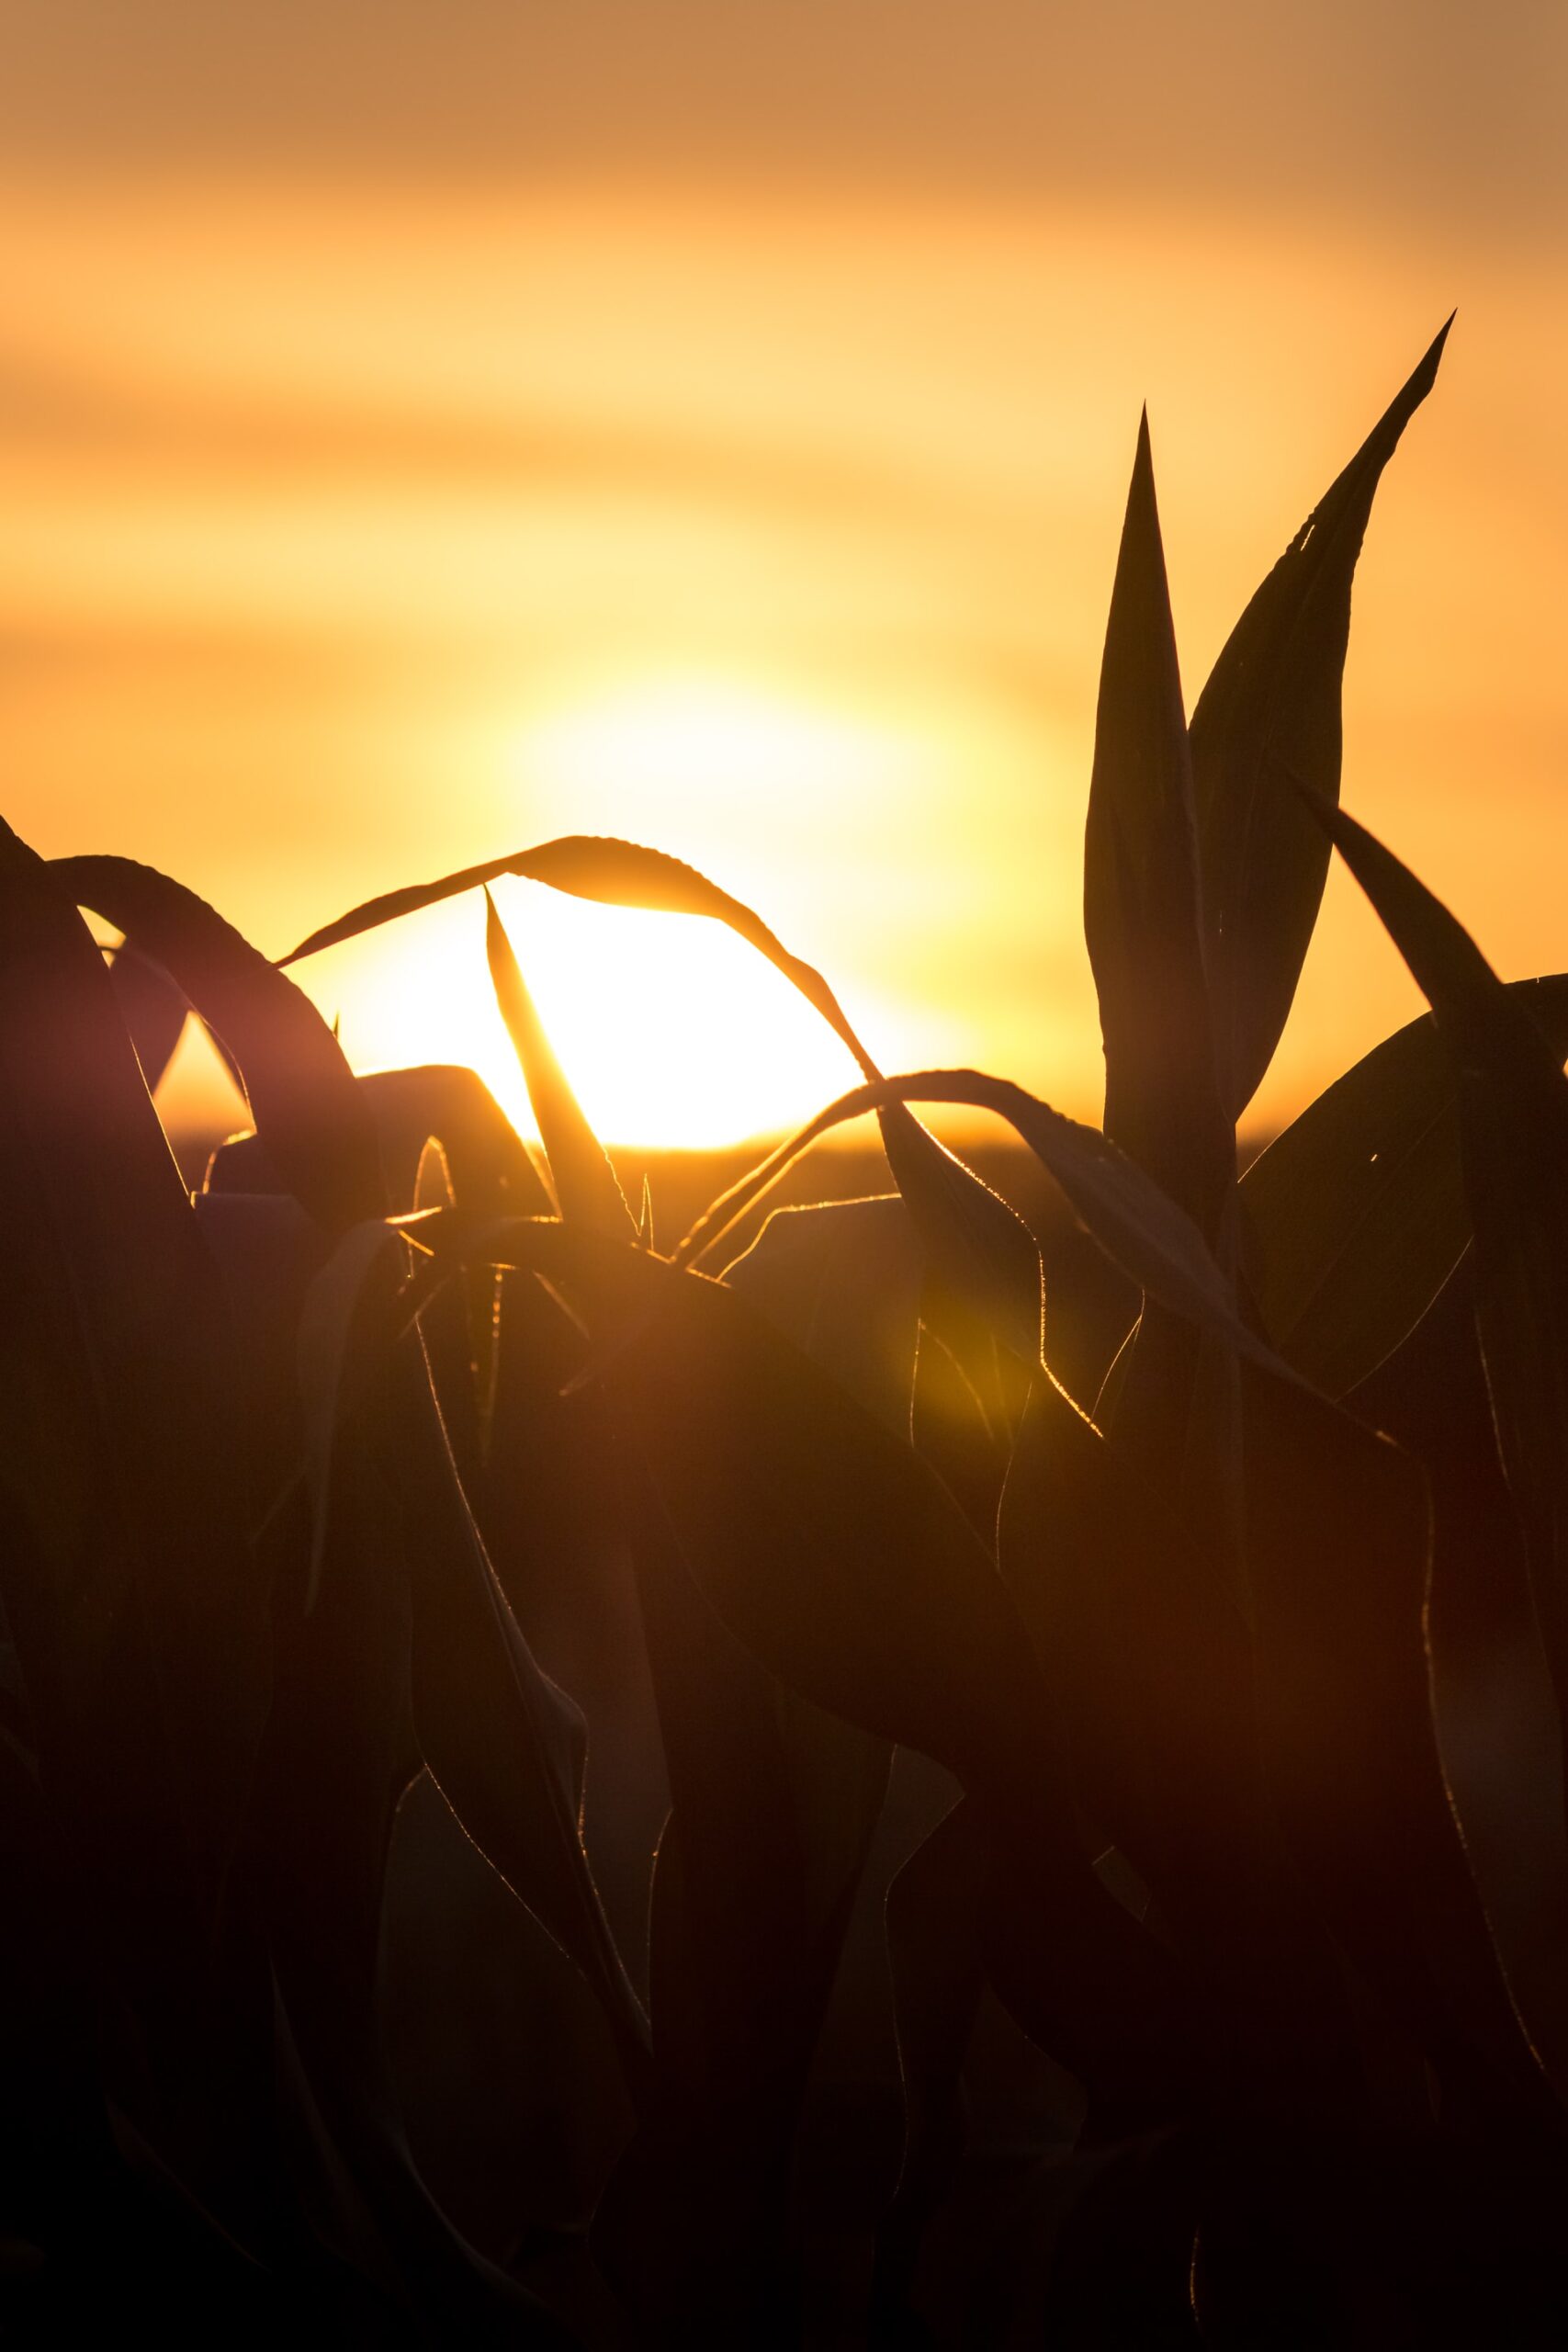
Nutmeg Disrupted

An Alberta girl eats, cooks, and grows!

By

The Food Bloggers of Canada Conference. The journey there.

Who knew the weather would play such a roll for FBC members across Canada.

Wednesday evening before I was to leave I received a call to inform me that my flight to Toronto had been cancelled. I was rescheduled on a earlier flight Thursday morning. Much earlier, like 5 hours earlier…. After a moment of slight panic I took a deep breath and headed to my closet. No problem, it just meant I had to get busy packing, it was looking like a long evening ahead. Between getting everything ready and nerves of excitement,( I had not been in a plane since I was a young child) headed to the biggest city in Canada, I was indeed anxious about the conference. Though you Tweet with many on a daily basis it still felt like I was walking into a room full of strangers.

I planned to arrive there a day early so I could get my bearings. Sleep late and try and get rested up. And give myself plenty of time to meet with fellow bloggers at the airport for the drive out to Hockley Friday afternoon.

After finally falling asleep around 2:30 the alarm rang at 4:15, my journey was about to begin. With just enough time to get ready and enjoy one steamy mug of hot coffee it was time to head to the airport. It was dark and calm out. Very nice for a drive out to the edge of the city. It is not often I am out & about during that hour of the day but I find that whenever I am, I marvel at the serene calmness of the world. Close to dawn yet still oddly silent. I just love it!

Unless I could be at home sleeping in my nice comfortable bed. Lord knows I could have used it.  I arrived to find out that the plane was full. And there was no other way out until the following morning. Same time. Same place.  The lovely woman from WestJet told me to go home and get some sleep.

On the drive home I realized all my travel plans out to the resort where now not going to work. I got home, brewed a fresh pot of coffee and enjoyed the 6:30 am sunrise.

Perks of a cancelled flight, an early morning sunrise on the prairies.

By 7:00 I received a Tweet from Michelle in Edmonton, her flight was also cancelled. There was an ice storm in Toronto playing havoc with many peoples travel plans.

We all seem to hit the Facebook page at the same time. Many now looking for rides out to the resort because of changing travel plans. Deep down inside worrying if we would make it there at all.

I lucked out and there were offers of rides for latecomers to Toronto. As fate would have it, she was also my roommate for the weekend! As we headed out of the city the conversation flowed. Of course it soon turned to a passion we both share. Photography!  Thank you again Heather. You were a fantastic roommate and I enjoyed hanging out and chatting with you throughout the weekend. The ride to Hockey Valley and then to Orangeville were greatly appreciated.  As was the help in getting my over full suitcase zipped. That was most definitely a team effort.

On my way into Toronto between flights, I caught a Tweet in Edmonton before I boarded my plane that there was an ice storm out at the resort and that the power was out. Yikes. This definitely was going to be a conference to remember. On the drive out the closer we got to Hockley Valley the more ice covered the trees and fences were. It was quite stunning. Though I imagine the drive a few hours earlier was probably quite hairy. Unsure of how the evening would go with no power we joked about roasting hot dogs outdoors over the fire. And really that would have been fine, we were just so pleased to be there.

The power had been restored just before we arrived. We checked in, got registered, then headed up to our room to get ready for the Cocktail reception. When the elevator doors opened there stood the lovely Michelle from The Tiffin Box. You would never have known her flight left Edmonton at 1 that morning. She looked amazing! It was so nice to finally meet her in person. We have been Tweeting each other for a long long time and I was so very glad she made it to the conference.

A quick change, a few curls and we were headed downstairs to mingle and check out the fantastic spread being presented by the sponsors of the event. The room was a swarm of food and drink, hugs and loud conversation. I was busy scoping out name tags trying to place names and faces with the tiny avatars from social media. I briefly chatted with some of the sponsors, trying out the wonderful samples they were offering. And just as I made it from one end of the room to the other it was time to be seated for dinner.

The dining room for the Food Bloggers of Canada welcome dinner


And what a dinner it was. Every course had wine pairings with a description of the wines and the vineyard they came from by Luke Orwinski from Rosewood Estates Winery.

The Poutine starter from the Food Bloggers of Canada welcome dinner.


Like any good Canadian conference our meal started with an amazing rendition of Poutine paired with the Rosewood 2011 Chardonnay Reserve. It was unlike an Poutine I have ever experience. Truly outstanding.

Wellington County Prime Rib w/sauteed Windy Fields mushrooms as the main at the Food Bloggers of Canada welcome dinner.


The main was a fork tender Wellington County Prime Rib with Yorkshire pudding, sautéed Windy Field’s mushrooms with a red wine jus. The wines were a Henry of Pelham Baco Noir & Rosewood Merlot.

Chocolate Trifle desset at the Food Bloggers of Canada welcome dinner.


Our meal was finished with a luxurious Chocolate Trifle of stewed berries, chocolate genoise, vanilla custard with Chantilly cream paired with a Henry of Pelham Icewine.

Every moment of the evening was perfect. The food was outstanding. The event started off with huge expectations for the weekend ahead.

You would have never known the power was out for most of the day. Truly a testament to the amazing staff at the Hockley Valley Resort, the entire planning crew from the FBC and all of the sponsors who took part in the cocktail reception. The evening was flawless.


The kitchen aid milkshake bar at the Food Bloggers of Canada welcome dinner.      The kitchen aid milkshake bar at the Food Bloggers of Canada welcome dinner.


Like any good Food Blogger Conference following dinner we were lead to the next room over where Kitchen Aid had set up a milkshake bar! The ballroom had been transformed into a movie theater where everyone could relax and unwind from the days events.

Exhausted I fell into bed that night and reflected on the day. I realized that not once was I nervous about being there. From the moment you walked in it was like being a room full of friends. All gathered because of common passions with a need to learn more and meet fellow foodies from across our great country. Where it was okay to take pictures of each course of our dinner and Tweet between bites of the amazing meal before us.  A fantastic feeling indeed!


Pin ItShare on Facebook

By

The First ever Food Bloggers of Canada Conference. My take.

This weekend I attended the first ever Food Bloggers of Canada Conference at the Hockley Valley Resort in Orangeville, Ontario.

The Food Bloggers of Canada Conference


When it was announced I knew immediately that I was going to be there.

I am not sure what I was more excited about? Meeting Ethan, Mardi and Melissa, the amazing trio behind the FBC? Seeing the faces of those I Tweet with on a daily basis? Meeting the bloggers I didn’t know before my trip to Ontario? The amazing line up of  speakers, we’re talking David Leite, Dianne Jacob, Dana McCauley, Mairlyn Smith, Alexa Clark, Adell Shneer, and many many more. Panels with some of the biggest bloggers in Canada, brands, a panel on publishing, a Chef, tons of tech information, even a book keeper! Or the food and wine that awaited us? Turns out, every second of it was pure epicness. re: Urban Dictionary example #2 ” Another word for epic to describe a monumental event. To the extreme”

The lessons I learnt were many. It was a weekend that far exceed my expectations and I am guessing it will take 4 posts if not more to sum up everything I took away from it.

It’s not that I have been doing it wrong. I feel like I have not been focusing on 100% of the content of my posts. I lean towards making pictures first, the words have become a second thought. The story at times, not being told at all.

David Leite speaking at the Food Bloggers of Canada Conference 2013David said something that I was so glad to hear.

There is nothing wrong with posts of at least 1000 words.
I think that has been part of what has been holding me back. You often read that it is recommended you keep your posts short and sweet. That long posts are boring and deter people from returning.
Of course, I disagree, a well told story with emotion will garner a readership. I have been cutting it short, editing how much I say, but you just can not tell a story in 300 words or less.
Not that I was needing permission but hearing that has really changed my focus.
Some of the things he said that really resonated with me were the about the written word.
Notes from the FBC conference w/David Leite.
You need to love language.
The voice determines the choice of words.
Have someone critique your work.
Punctuation creates rhythm.
Write about what you are passionate about.
Saying that, David Tweeted me Wednesday morning, I was very touched by his opening of the Q & A session on Saturday when he mentioned his gramdmother. It was one of the moments over the weekend that brought me to tears. I could so relate to his emotion in those moments. How powerful the love we both have for our grandmothers and how food can bring those thoughts back to us immediately, just from a smell, or a technique we learnt in their kitchen.
He had mentioned  that my latest post was touching. Which I was glad to hear. But in reflection it did not evoke enough emotion for him leave a response on the blog. So I know where I need to do the work.

I want to find a voice where everyone can relate and respond.
He was a fantastic speaker and I am so glad he was asked to be at the conference. The lessons I took away from his words are very much appreciated. And exactly what I needed to hear.
Now to do the work, and find my voice.
Share on Facebook

By

Life, death and regrets.

You may have noticed there sure have been a lot of lobster posts here on Nutmeg Disrupted lately.

And I have one more to put up.

I feel a bit stuck right now. Not in a rut so much as just avoiding a place where I am not sure I am ready to go yet. But if I don’t now, when?

Funny how death does that. Pulls the rug out from beneath your feet. Brings such clarity. Makes you question your choices and decisions.

After a nasty physical confrontation with some members of my family which caused my first son to be born a month early, I decided to walk away from my family.

That was almost 15 years ago. And I never looked back. Pride, fear, and anger fueled my stubbornness.And I have never regretted it for a moment. It was what I needed to do. Like a crushing weight being lifted off my chest.

Until now.

Baba


My baba died earlier this year.

I don’t think she ever knew what had happened. Why I left and never looked back. I always meant to go see her. But fear can be a very powerful emotion. So many times I wanted to go see her. Or write her a letter letting her know she was always on my mind. And yet, I did nothing. Because I was just so damn scared.

My regret is huge. Really there are no words to describe how very sorry I am. To walk into her funeral with my son, now 13, her never having ever met him. It breaks my heart on so many levels. I guess this is my punishment for my decisions. My lack of action. My stubbornness. For letting my anger with some, ruin relationships with all.

As I sat listening to the stories at her service I started to remember. Remember all the times we spent together. All the things I learnt from her. Of how alike we were.

She was the first member of the family to be behind the camera. Her gardens were nothing short of amazing. And though her food was simple, it was all about the love she put into it. For her family.

So many regrets. My heart is indeed heavy. As I wait for the never ending winter to go so I can find some sort of peace in my garden, I cook through my grief.

She may not have known it, but she was one of my hugest inspirations.

This is a soup she would make. Simple ingredients fresh from the garden!

I remember sitting in her kitchen watching, learning, eating.

Thank you Baba. xoxox

Borscht 2


Borscht

8 – 9 large beets

2 cups of carrots (cut into coins)

2 cups of green beans (chopped)

1/4 cup of fresh dill  (chopped)

1 large onion (chopped)

2 tablespoons of sugar

salt & pepper

To prepare beets: Leaving about 1 inch of stem on give beets a wash. Fill a large pot with the beets. If you have large and small beets, use 2 pots, one for each size. Cover beets with water and place on high to bring to a boil. Once it begins to boil turn heat to medium to continue cooking. Small beets take 15 minutes, larger ones take up to 30 minutes. You will know they are done when pierced with a fork. Strain beets and plunge into cold water. Taking a knife remove stem end, the skins will just slide off. Give a quick rinse under cool water and slice into a bowl or soup pot.

veggies for borscht


Add the carrots, beans, onions and dill and cover with water.

Bring to a gentle boil and cook until the carrots are cooked through.

Serve with cream or sour cream.

borscht


Pin ItShare on Facebook

By

Lobster Eggs Benedict

If you are a regular reader you know I use a lot of lobster in my kitchen.

It just seemed natural to use it for breakfast.

all that rmains


I could have made crepes but find that to be more of a lunch option so I went with the obvious, Eggs Benedict.

The creaminess of the eggs with the lemony hollandaise sauce with sweet buttery lobster and a hint of smokiness from the back bacon is the perfect way to start the day.

I use the frozen whole PEI lobster from left over from the lobster boil for Eggs Benny. The tails are a bit larger and denser then the canned lobster.

steaming lobster


I just take it out of the freezer, allow to warm a bit on the counter then pop into the top of the steamer and steam until warmed through. Then it is just a matter of breaking them down. A good twist removes the tail and claws from the body.

breaking down the lobster


Give the tail a good squeeze with the belly side facing up. Then turn over and pull the shell open and pull out the tail meat.

For the claws it is good to have some crab crackers on hand. The shell is hard to break through and crackers make this much easier.

legs for soup


I save the legs for soup.

Once you have the lobster prepped you can get everything else ready starting with the hollandaise.


Hollandiase

4 egg yolks

1 tablespoon freshly squeezed lemon juice

1/2 cup unsalted butter, melted (1 stick)

Pinch cayenne

Pinch salt

Yolks for hollandaise


Whisk the egg yolks and lemon juice together in a stainless steel bowl and until the mixture is thickened and doubled in volume. Place the bowl over a saucepan containing barely simmering water, the water should not touch the bottom of the bowl. Continue to whisk rapidly. Be careful not to let the eggs get too hot or they will scramble.

making hollandaise


Slowly drizzle in the melted butter and continue to whisk until the sauce is thickened and doubled in volume. Remove from heat, whisk in cayenne and salt.

adding cayenne


Cover and place in a warm spot until ready to use for the eggs benedict. If the sauce gets too thick, whisk in a few drops of warm water before serving.

In a small pot bring water with a tablespoon of vinegar to a boil. Gently break two eggs into the boiling water and allow the egg to cook.

poaching eggs


Using a large slotted spoon gently remove poached eggs to a plate to drain.

In a small sauté pan lightly fry 2 pieces of back bacon until nice and hot.

Meanwhile split and toast an English Muffin.

lobster eggs benny


Now build your Benedict starting with the English Muffin and a slice of back bacon. Gently place the poached egg on the bacon. Now add a large dollop of hollandaise onto the egg. Top with a lobster tail.

It is a fantastic way to kick breakfast up a notch for those special occasions. Or just because!

Luxurious and decadent is required every once in a while.

Enjoy.


Pin ItShare on Facebook

By

Fresh Atlantic Ocean Lobster Boil.

I admit, I am very lucky to have the connections I do. I can have fresh seafood from eastern Canada on an airplane and flow to me with 48 hours of my request.

Some things are seasonal, so I always try and stock up during the high seasons.

I will be placing my order for scallops in the next 6 weeks. For just over $200 I will receive enough scallops to last roughly a year. They arrive fresh being out of the ocean less then 24 hours. Love my seafood guy! He is from the east coast so he is not only a great source for the freshest seafood available, he is full of cooking tips and advice for treating the seafood as it was meant to be. And it is great to teach him about the fish from the west coast. So far he has been impressed with my salmon and halibut creations. And he let me cook a wild board for his wedding! Still need to get that post up……….

Then there is my lobster guy! He is also from the east coast, but a different island then my scallop guy. He works here in Alberta and hand delivers cases of bottled lobster when he returns from his trips back home. I have Tweeted about my bottled lobster numerous times and people are always curious as to what it is I am talking about. I have to say, it is amazing. Fresh lobster bottled at the peak of its freshness.

IMG_5359


Somewhere along the way I got a phone number to a connection for fresh lobster. It would fished and package and on a plane within hours. After discussions with my seafood guy we picked what week would be the best for optimum lobster and placed the call.

Cases of fresh lobster from the east coast of Canada.


Within 12 hours we had 2 cases, 40 of the freshest live lobster I have ever enjoyed.

Live lobster flown in from Eastern Canada.


The evening started off with one of the most amazing storms I have ever had the luck to witness. I stood out back for over an hour watching it build. And the payoff was worth it. I captured some of the most fascinating storm shots of my life.

Storm the night of the lobster boil


After it moved off towards Grande Prairie it turned into a gorgeous summer evening. The turkey cooker and pots were all ready to go out on the deck. The wine was chilled, corn was boiled, butter melted. Let the cooking marathon begin.

PEI Lobster


You never ever freeze raw lobster, it must be cooked first so the plan was to cook everything and get it on ice before we ate.

In a perfect world we would have had fresh ocean water for the boil but being in the northern prairies we had to create the ocean water. I used 2 tablespoons of sea salt for every quart of fresh water.

Pots ready for the lobster boil


Bring the water to a boil. Now take your lobster and cross his from legs and remove the rubber bands from the claws. Now place them head down into the boiling water.

Fresh lobster from the East coast


Cover, return the water to a boil and then lower the heat to a bubbly simmer. Lobster will cook in 12-20 minutes depending on the size. Canners will cook in 12-15 minutes, while large lobsters will require up to 20 minutes of cooking time. Timing should start only after the water has returned to a boil. Once cooked, the lobster should be drained immediately.

Ready to feast on fresh PEI lobster.


They can now be served hot or chilled quickly by being placed in large tubs of ice water to stop the cooking process and the chill the meat.

Summer lobster boil feast!


After the feast I packaged all the remaining lobster in FoodSaver bags and moved them to the freezer.

Prepping lobster for the freezer


It is really nice to be able to grab a few from the freezer and pop them onto the BBQ as an addition to a steak dinner or quickly warm them for a breakfast feast of Lobster Eggs Benedict.

After a fantastic night of storms, food, after all my friends had left, I sat out back and watched a stunning 3:30 am sunrise.

Saturday morning sunrise


The perfect end to the day!


Pin ItShare on Facebook

By

Bacon Onion Turnovers

These are as good as they sound!

Eat a few or eat a lot! They are just fantastic little portable pockets of love.

I found these gems on Taste of Home many years ago and have been making them ever since.


Bacon Onion Turnovers – adapted from Taste of Home


3 packages (1/4 ounce each) active dry yeast

1/2 cup of warm water – 110 – 115 degrees

1 cup of warm milk – 110 – 115 degrees

1/2 cup of butter – melted

2 teaspoons of salt

3 1/2 to 4 cups of flour

1 pound of bacon, sliced,  cooked and crumbled

1 large white onion – diced

pepper to season

1 egg – lightly beaten


In a large bowl, dissolve yeast in warm water. Add the milk, butter and salt; beat until smooth. Stir in enough flour to form a soft dough.

Dough for bacon onion turnovers.


Turn onto a floured surface; knead until smooth and elastic, about 6-8 minutes. Place in a greased bowl, turning once to grease top. Cover and let rise in a warm place until doubled, about 30 minutes.

Punch dough down. Turn onto a lightly floured surface; divided into 30 pieces. Roll each into a 4-in. circle.

Bacon Onion Turnover circles.


Combine bacon and onion; place about 2 teaspoons on one side of each circle. Fold dough over filling; press edges with a fork to seal. Place 3 in. apart on greased baking sheets. Cover and let rise in a warm place until doubled, about 20 minutes.

Raw bacon onion turnovers rising.


Brush with egg. Bake at 425° for 10-15 minutes or until golden brown. Remove to wire racks. Serve warm. Yield: 2-1/2 dozen.

Fresh Bacon Onion Turnovers.

Pin ItShare on Facebook

By

Cream Cheese Puff Pastry cookies.

In an effort to play catch up from the past couple of weeks I am digging into my files from 2012.

2 weeks ago I lost my last living grand parent. It has been hard. There were things left unsaid and it makes my heart heavy. When I returned from her funeral I immediately started a new job which has turned into what I can see as a long time position but also, it was a much needed distraction.  Thankfully I shoot everything I do so it is nice to have a little cache of work I can use until I am fully adjusted to my new schedule.

These delicate cookies are always an fancy addition to my cookie trays.

Super easy to make, they have a fantastic flavor and the texture is just wonderful.


Cream Cheese Puff Pastry Cookies

If you prefer darker chocolate, use semisweet chocolate chips in this recipe.

17-oz. pkg. frozen puff pastry –  thawed 8-oz. pkg.

cream cheese –  softened

1/4 cup sugar

2 cups milk chocolate chips

Make sure that you thaw the pastry according to package directions. In small bowl, combine softened cream cheese and sugar and mix well to blend. Roll one sheet of the thawed puff pastry into a 14×10″ rectangle.

Rolled out puff pastry for cookies.


Spread with half of the cream cheese mixture, leaving a 1″ border on one long side of the dough.

Puff pastry with cream cheese


Sprinkle cream cheese filling with half of the chocolate chips.

Puff pastry with a layer of chocolate chips


Roll up pastry, starting at long side, and finishing at the side with the uncovered border of pastry.

Rolling the pastry.


Brush this edge with a bit of water, and seal pastry by pinching gently.

Repeat with remaining sheet of pastry and remaining ingredients. Cover and chill rolls for at least 1 hour. When ready to bake, preheat oven to 375 degrees. Line cookie sheets with foil or parchment paper.

Sliced Puff Pastry cookie rolls.


Cut rolls into 1″ thick slices, and place cut side up on prepared cookie sheets.

Raw Puff Pastry cookie.


Bake at 375 degrees for 20-25 minutes until pastry is golden brown. Let cookies cool for 2 minutes on cookie sheets, than remove to wire racks to finish cooling. 24 cookies.

Puff Pastry Cookies

Pin ItShare on Facebook

By

Grow Room 101. Indoor gardens.

My dream job would be to run an indoor grow space year round and sell fresh herbs and vegetables to local chefs.

Gardening indoors under lights


Living in northern Alberta makes for a very short growing period with gardens usually going into the ground around the 18th of May and the first hard frost usually by the second week of September. That is roughly 16 weeks. To have a heartier harvest I start my seeds in January and plant semi mature plants outside during the first week of June. Depending on conditions, that may not even be enough of a head start for fully ripe crops of peppers, tomatoes and melons.

With such a short season,  growing indoors is a fantastic alternative. With a little bit of thought and good planning you can recreate mother nature in an indoor space and grow successfully year round. It does cost a bit to set up your grow room but with the capability of growing home grown produce year round you will be saving money and have an endless healthy, chemical free supply of some of the best vegetables herbs and fruits available.

This is just a quick run down of what it takes to put together a grow space. If you have any questions about what is discussed here or anything I did not cover please leave a comment or shoot me an email! Talking about grow spaces and indoor gardening is one of my passions and I would love to hear from you.
You have a few things to consider when putting together your grow room.
The space I am talking about below is based on an 10×10 foot room. That is some serious gardening!
You will need 2 lights for your space.
The first is a Metal Halide. Metal halides are the most efficent source of white light availble on the market. They come clear or phosphor coated. Go with the clear. The coating changes the specturm a bit. Clear is better.
Next you will need a HPS – High Pressure Sodium light. They are also one of the most efficent lights available.
Those 2 lights combined will give you the perfect light spectrum for your grow area.
I used strictly 1000 watt bulbs. Yes that is a lot of light. Your $$$ value is best spent on the 1000 watt systems.
You could go with 400 watts with each bulb/system,  but considering the cost of each system will be very close to the price of 1000 watt systems,  the 600 watt jump with each bulb seems to make sence for getting the best bang for your buck.
Look at it this way – Would you rather garden under full sun, or a cloudy day?
I love 1000 watt lights. They are amazing for indoor gardening!
Do you need 1000 watt lights? Perhaps, that is one of your choices.
Now we need to discuss shades.
You NEED big round 4 foot shades. They are an absolute must. They push 100% of your light down and out.
They increase the light intensity substantially. Try and find shades that are white on the inside, the more light reflection the better. Both lights will need a shade. They are cheap, so be sure you get them. They make all the difference in the world.
Using a 1000 watt metal halide with a small 2 foot shade and no reflective walls give you and effective growing area of only 36sq feet.  Using that same light with a 4 foot hood and flat white walls your effective growing area has now increased to 100 square feet. Big shades mean much more powerful light.
Next thing to look at is your space. What is on the walls? You have a few choices.
Lets talk reflection of light.
If you are painting I do suggest the use of flat white paint.
Using a flat white will bring the reflectiveness of the wall space back into the growing area by 85 – 93%
Want to kick that up even more.
There is a white agricultural plastic on the market. It is black on one side, white on the other. We are talking 90 – 95% reflection of light back into the space!
Any farm supply store will carry it. It is used for silage.
Bonus, it protects your walls from any moisture.
Now we need to discuss light coverage.
Each bulb emits a different spectrum which affects the growth of the plants differently.
As with any plants it will grow towards the lights. But we want even growth.
Now you could go in and rotate your plants every few days, which works. For a while.
But to really make it the ultimate indoor grow space you want to emulate the rise and fall of the sun.
To do this you need a light rail/tracking unit.
I promise, this is the last thing you need to buy.
But again, it really is a must. With using a light rail/tracking unit to move the light you will have an increase of 25 – 35% of light coverage with using one light rail to move the lights over the garden. With just simply moving the lights over the garden it emulates enough light as if you were actually using 3 bulbs.
Now that is getting the absolute most of your space, money and light.
You will need to make the rail that you hang the lights off of then attach it to the tracking unit. It slowly goes back and forth over the garden. Get creative here, you should be able to find a nice light metal bar at your local building supply store.  Even some plactic pvc pipe with the lights at each end is sufficient. And it works like a charm. This will give your room an amazing amount of useable light.
We need to go over movement of air.
These lights are hot and it is imperative that you have a fan in your grow space. Just as it is outdoors, you need to have air movement in your indoor garden. Not only will it reduce humidity and cool the space, plants do much better and grow stronger when there is a breeze present.
Also as a final thought, just kind of  be aware of where you have been before entering your room.
Like say you were at a greenhouse and were touching plants, maybe bought a few. Wash up before going into your room. Even change your clothes.. Because like outdoors those little bastards like spider mites love warm sunny grow rooms. And to battle them is just a nightmare. No need for extra work.


Pin ItShare on Facebook

By

Easy to make Baklava at home.

Making Baklava in the Nutmeg Disrupted kitchen.


Baklava. Those sweet sticky squares of nuts and cinnamon layered between sheets of flakey phyllo.  Everyone has had it at one time or another.

Seems complex but is actually one of the easier treats you can make.

You can find the phyllo dough in the freezer section of most grocery stores.

I used pecans and almonds for my recipe. I chop them in the food processor to make quick work out of it. Definitely not the traditional nuts that are usually used in baklava but they are the 2 nuts I always have on hand.

Baklava

 1 (16 ounce) package phyllo dough

1 pound chopped nuts(4 cups)

1 cup butter

1 teaspoon ground cinnamon

1 1/2 cups of water

1 1/2 cup of whiter sugar

1 1/2 tsps of vanilla

3/4 cup of honey


DIRECTIONS

Preheat oven to 325 degrees F(175 degrees C). Spray  the bottom and sides of a 9×13 inch pan with non stick spray.

Chop nuts and toss with cinnamon. Set aside. Unroll phyllo dough. Cut whole stack in half to fit pan. One package will make one 9 x 13 pan of Baklava. Cover phyllo with a dampened cloth to keep from drying out as you work. Place two sheets of phyllo dough in the pan, butter thoroughly. (I melt the butter and gently brush it on with a pastry brush.)   Repeat until you have 8 sheets layered. Sprinkle 2 – 3 tablespoons of the nut mixture on top. Top with two sheets of phyllo dough, butter the dough, add 2 -3 tablespoons more of the nuts and repeat, layering as you go. (There will be about 12 thin layers of nuts.)The top layer will be like the bottom layer and  should be about 8 sheets deep, no nuts within the top 8 layers. We do this to create a somewhat solid layer to hold the Baklava together once cut.

Using a sharp knife cut into  square shapes all the way to the bottom of the pan.

Making Baklava in the Nutmeg Disrupted kitchen.


Bake for about 50 minutes until the Baklava is golden and crisp.

Making Baklava in the Nutmeg Disrupted kitchen.


Make the sauce while the baklava is baking. Boil the sugar and water just until the sugar is melted. Add the vanilla and honey. Simmer on low for about 20 minutes.

Remove baklava from oven and immediately spoon sauce over it. And yes, use all the sauce, it looks like a lot but the layers of pastry will absorb every last drop of it! Allow to cool.

Making Baklava in the Nutmeg Disrupted kitchen


Usually as an addition to my cookie trays I like to serve the baklava in cupcake liners, not only does it keep the tray clean it make for easy serving.


Pin ItShare on Facebook

By

Canning salsa with fresh ingredients.

It was the summer of bumper crops in the Nutmeg Disrupted gardens. By gardens,  I mean flower beds and numerous containers. The “garden garden” was covered with grass a few years back because of time constraints with work and travel.

I miss my garden. The original garden I first started with turned into a 4000 square foot growing oasis. I had huge tubs set around the perimeter to collect rain and to help make the task of watering not quite such labor intensive work. And it was easier on the well  Each row was mulched with layers of newspaper which I then covered with a thick layer of freshly cut grass, which was topped up weekly. I was cutting 7 acres so there was always a fresh supply.

Then in the fall the garden would be put to bed for the winter with a thick layer of leaves. The complete farm was surrounded by trees, by time you raked and loaded the 20th truckload you stop counting!

Then in the sping a farmer from over by Radway would come with his magic tractor sized tiller and for $30 turn it all into 2 feet deep of  pure black gold!

Gosh I miss that garden!

But downsizing does not mean you can not have success. With a bit of creativity and good gardening practices you can have a fantastic harvest from limited space.

I start my seeds under lights in the winter. Being in northern Alberta I like to get a bit of a jump on the growing season. Espically for things like peppers, tomatos and celery. My growing season is relatively short and you never know if those super hot temperatures will be acheived so the more mature the plants are the better success for a bountiful harvest is possible.

Tomato plants from the Nutmeg DIsrupted gardens, Grande Prairie Alberta      Tomatos from the Nutmeg DIsrupted gardens, Grande Prairie Alberta


This year I grew tomatos in containers and in the 2 flower beds out back. It was an extremely early Spring followed by a record breaking summer. And my garden showed it. Off of 8 tomato plants I harvested well over 100 pounds of tomatos.

The salsa recipe is a combination of a few recipes.  Having never made salsa before I am extremely impressed with how it turn out. The depth of flavor is just fantastic. Tangy and smokey with a nice freshness to it. I did a few different takes on the recipe making one mild and one with a nice kick of heat.

A bumper crop of tomatos from the Nutmeg Disrupted gardens


fresh tomatos for salsa


Salsa

24 cloves of garlic – minced

20 large tomatos – diced

2 large red onions – chopped

1/2 teaspoon of dried corriander

1/2 cup of fresh squeezed lemon juice

1/2 cup of fresh squeezed lime juice

2 tablespoons + 2 teaspoons of chili powder

2 tablespoons + 2 teaspoons of cumin

2 teaspoons of salt

2 teaspoons of pepper

4 tablespoon of honey

2 tablespoons of dried parsely

1/4 teaspoon of celery salt

1 cup of vinegar

*additions for hot salsa

*3 habanero pepper

*5 red thai chili peppers

*1 serrano pepper

Processed hot peppers for salsa on Nutmeg Disrupted


If you have a food processor do use it to chop the hot peppers. Beware of the pepper fumes when removing the lid if the processor. If you are chopping by hand wear gloves if you can. If not be aware of the hot pepper oils on your skin. Wash immediately after prep. Hot pepper oils can burn.


Straining tomatos for salsa on Nutmeg Disrupted      Tomato water, making salsa on Nutmeg Disrupted


Place the chopped tomatos into a colander over a bowl. Allow to drain for 15 minutes to remove some of the tomato water. You would be suprised at how much water you collect.

Fresh garlic for salsa on Nutmeg Disrupted      Fresh ingredients for salsa on Nutmeg Disrupted


In a large pot combine all the ingredients and stir well to mix completely.

Slow simmer for up to 2 hours on medium heat stirring occasionally. Cook until desired flavor and consistancy is acheived.

Canning fresh salsa on Nutmeg Disrupted      Processing salsa in a hot water bath on Nutmeg Disrupted


Ladle the salsa into hot jars. Clean the rims of the jars with a clean cloth. Add rings and tighten until just finger tight. Place all the filled jars into a hot water bath and process for 20 minutes. Allow to cool.

Fresh made salsa on Nutmeg Disrupted


Pin ItShare on Facebook
Content Protected Using Blog Protector By: PcDrome.